Social Icons

delicioustwitteremail
Showing posts with label apps. Show all posts

Tuesday, September 11, 2012

How To Cap Frame Rates with an FPS Limiter

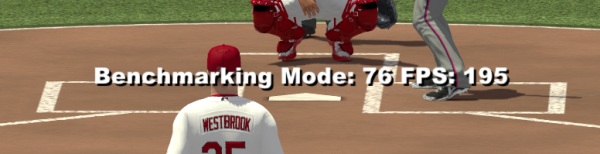
Let's say you're playing an older game, something like Half-Life 2. If you've got a modern gaming rig chances are you're seeing framerates well above 100fps. While many people argue about the limits of human vision and how that applies to framerates, it's safe to say that you're really not benefiting at all from running a game at 195fps. You're putting a lot of unnecessary stress on your system and creating a ton of heat for little to no actual benefit.


Most games have V-sync options that try to sync your framerate to a multiple of your monitor's refresh rate, usually giving you a somewhat steady 30 or 60fps. Unfortunately, this sometimes introduces noticeable input lag. I recently installed CounterStrike: Global Offensive and the mouse feels horrendously laggy under V-sync. Mouse lag and first-person shooters generally don't mix well.

Thankfully it's possible to use a couple of external utilities to limit fps, keeping things well into the "visually smooth" realm while giving your GPU a break.

I've mentioned NVIDIA Inspector in the past for its Multi-Display Power Saver, but the utility also includes the ability to tweak some driver settings. The most recent version (1.9.6.6) can be downloaded here.

To enable the fps limiter, right-click the "Show Overclocking" button and select "Driver Profile Settings."
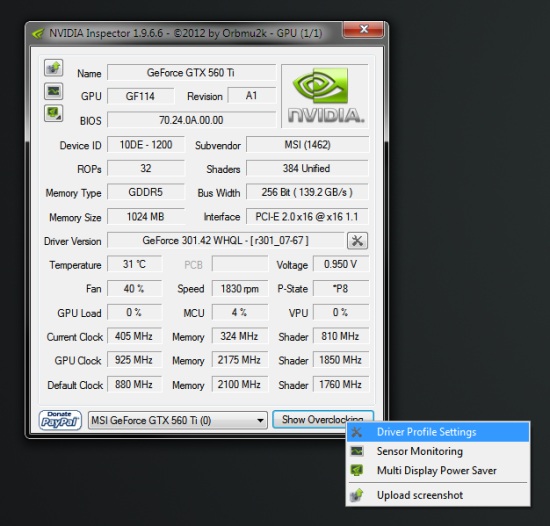


From here, find the "Frame Rate Limiter" listing under the "Common" subheading and choose an fps limit from the dropdown box.


You may need to play around with the limit depending on the games being played and your monitor's refresh rate if you experience any screen tearing or other visual oddities. So far I haven't had any issues.

If you've got an AMD graphics card or don't feel like downloading NVIDIA Inspector, you're not out of luck. MSI Afterburner (and apparently EVGA Precision, though I haven't used that) offers an fps limiter as part of the utility's On-Screen Display program. You can download MSI Afterburner 2.2.3 from Guru3D here.

Open up the MSI On-Screen Display Server - either via the tray icon (airplane with a pink "60") or the start menu - and click on the wrench.


You'll see the framerate limiter listed under the General tab of the window that pops up.

Using the Afterburner method also lets you set profiles for each application you're using. Selecting a different program (or adding your own) from the list allows you to tweak settings individually, so if you'd rather not enact a global limit you've got that option.

Don't be afraid to play around with the settings of either program in order to find what works best for your system. Your graphics card will thank you.

Thursday, August 23, 2012

Enable Power-Saving Mode on NVIDIA GPUs with Multiple Monitors

A few months ago I pulled an old 17" LCD out of the closet and decided to try out a dual-monitor setup. The extra screen real estate is amazing; I can watch MLB.tv or SC2 streams on the second monitor or check out system temps while I'm gaming. There's one issue that I quickly noticed, however - my 560 Ti wasn't downclocking at all, instead running full blast and idling around 15°C warmer than usual. Nvidia says that this happens with monitors running at two separate screen resolutions and that forcing the cards to run at full power prevents screen flickering.

Thankfully, there's a program called NVIDIA Inspector that includes a handy utility: Multi Display Power Saver. You can download the most recent version (1.9.6.6) here.

After installing and running the program, right-click on the "Show Overclocking" button and run the Multi Display Power Saver. You should see something similar to the following:

Select the GPU you wish to downclock from the list at the top right and you should be good to go. This forces the GPU into a low-power state to keep energy usage and temperatures down. To allow the GPU to switch back into a higher state for games and other programs, you can either set a threshold with the sliders at the bottom or just whitelist each of your games individually. It adds an extra step to the installation process every time you want to play a new game, but it's otherwise pretty easy. To whitelist a game, right-click the area under "Full 3D Applications" and select "Add from File" to manually find the EXE or "Add from running GPU Process" if you have the program running in the background. The right-hand box of "Video Applications" include programs that should be run in a medium power state, so I've got things like media players and the plugin containers for Firefox and Chrome that handle video playback listed here. I threw the included Windows games in there too for shits and giggles; after all, I require premium performance during my Solitaire and Free Cell gaming sessions.

There's an option to start the MDPS utility at Windows startup, but I ran into a conflict with this program and MSI Afterburner, which I use for overclocking. While the MDPS is active for a certain GPU you won't be able to change any of its clocks, so if Afterburner starts up after MDPS you'll run into a problem. If you encounter this issue, the easiest fix is to delay the startup of MDPS by 30 seconds or so to give Afterburner time to start and enable your overclock. There are several ways of delaying startup - downloadable applications, batch files, or the Windows Task Scheduler - and you can find more information here and here.

The same problem I mentioned above exists when you're overclocking, but there's an easy workaround. Simply uncheck your GPU from the list on the MDPS window, tweak whatever needs tweaking in Afterburner or your program of choice, and recheck your GPU in MDPS once you're finished. You can actually use NVIDIA Inspector to handle your overclocking if you want, and it includes voltage control.

As a result of using the Multi Display Power Saver, my idle temps dropped from around 40°C to 26°C. If you're using multiple monitors with Nvidia cards and you're worried about downclocking, definitely give MDPS a look.

Download NVIDIA Inspector 1.9.6.6 from Guru3D: http://downloads.guru3d.com/NVIDIA-Inspector-1.9.6.6-download-2612.html

Thursday, August 9, 2012

17 System Apps for the PC Gamer

Every "Best Actor" winner has a strong supporting cast that helps to elevate his game. When it comes to PC gaming, these apps will help you take your fragging to the next level.

CoreTemp - http://www.alcpu.com/CoreTemp/

CoreTemp is a super small, super useful program that monitors the load and temperature of each core of your CPU. Knowing your CPU's temperature is useful in a bunch of ways - you know whether or not the CPU fan is working correctly, you can gauge how hard a particular game is taxing your PC, and you can determine how much overclocking headroom you have. CoreTemp readings can be displayed on your taskbar or through one of the many programs that integrate CoreTemp readings into their output. I had a Logitech G15 keyboard for a while and could see my temp on the LCD screen, and right now I'm using Rainmeter to show CoreTemp data on my second monitor.

CPU-Z - http://www.cpuid.com/softwares/cpu-z.html

CPU-Z shows you just about everything you could want to know about your processor. Name, speed, clocks, multiplier, voltage, and much more. You can also scope out the details of your motherboard and RAM, which is especially useful when you're trying to make sure that your RAM is running at the correct speed.

 
AnandTech
Tom's Hardware Reviews
Ars Technica